CallZap User Guide
Quick Overview
- Enable in Togile CRM: Super Admin installs app and adds users via Marketplace.
- Mobile Onboarding: Download, grant permissions, SIM selection, OTP login.
- Call Logging: Auto-generates leads with duration, outcome & history.
Important: Super Admin must enable the App & the users in app.togile.com before mobile login.
Part 1: Enable in Togile CRM (Super Admin)
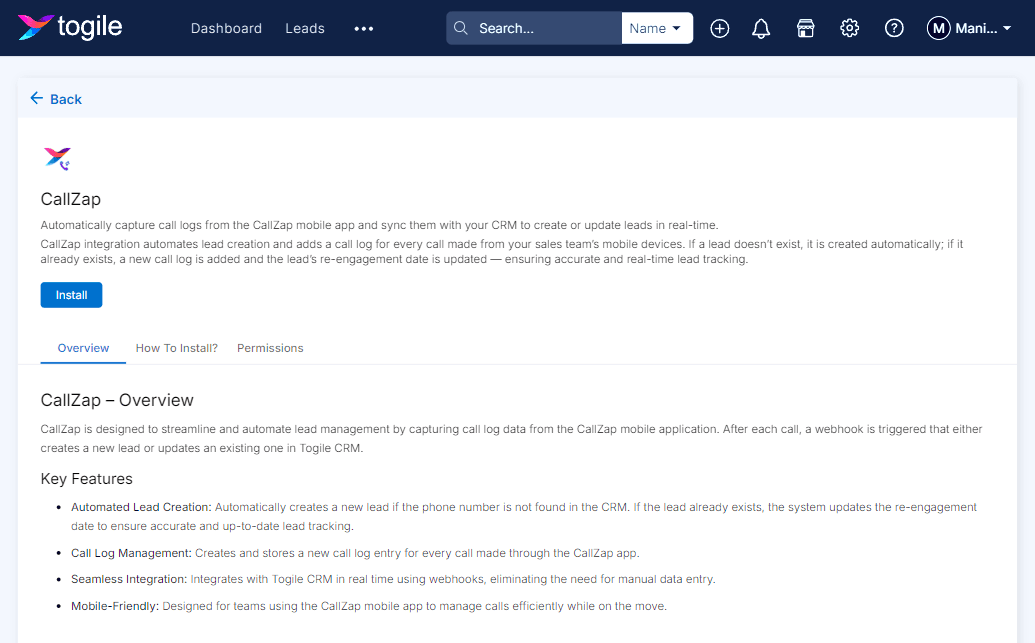
1. Install CallZap
- Login to app.togile.com
- Navigate to Marketplace → All Apps
- Find CallZap → Click Install
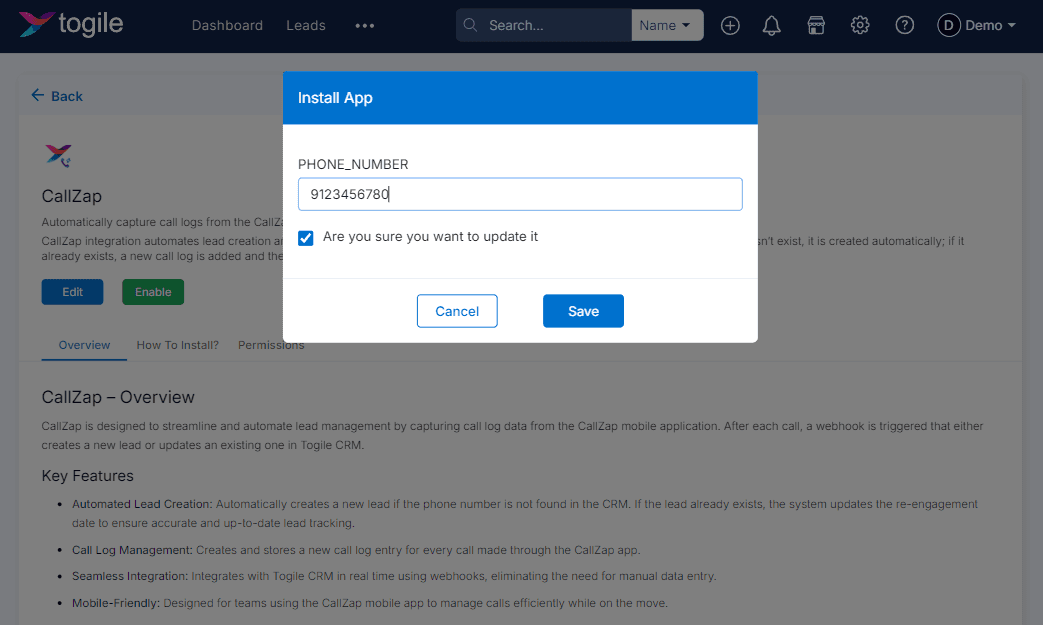
2. Confirm Installation & Enable the App
- Enter valid 10-digit valid mobile number & confirm the Installation.
- After installation click to enable the CallZap App.
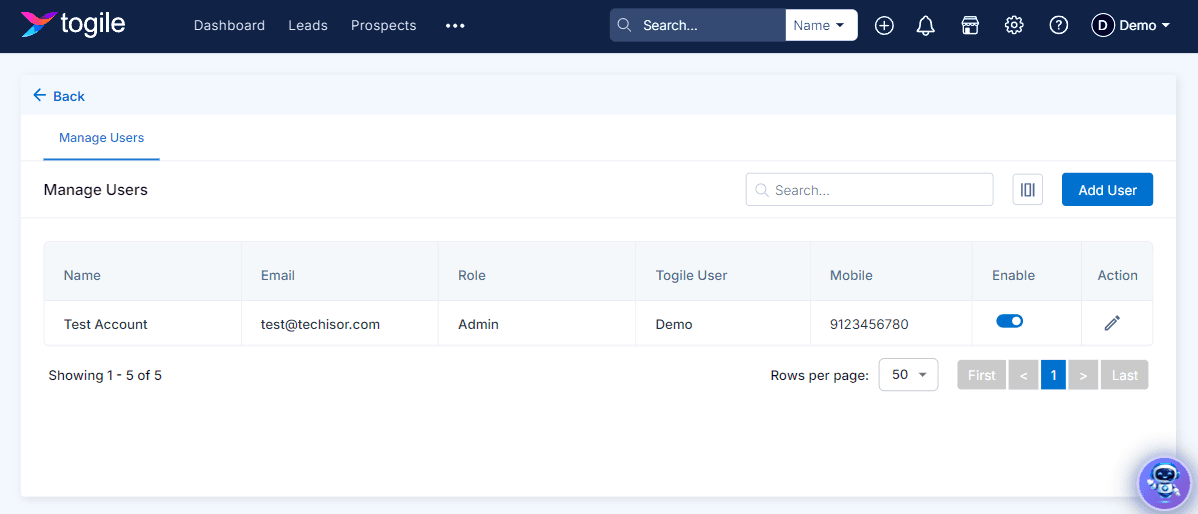
3. Manage Users
- Go to Installed Apps → CallZap → Manage Users enabe the user if it's not enabled.
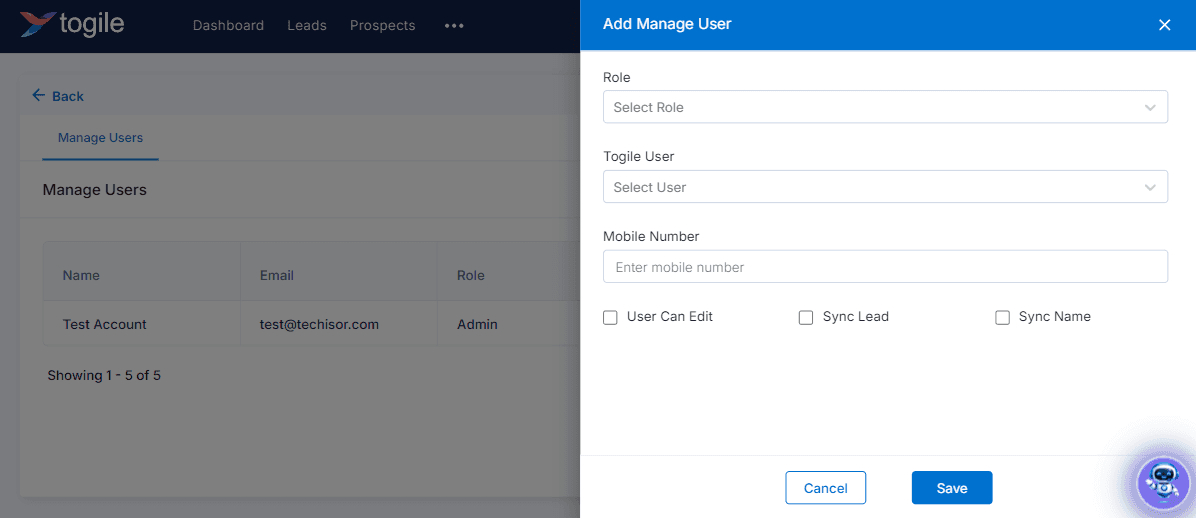
4. Add Users
- Click on Add User button and fill the required details to add a user.
- Same mobile number used for calls and CallZap app authentication.
Part 2: Mobile App Flow
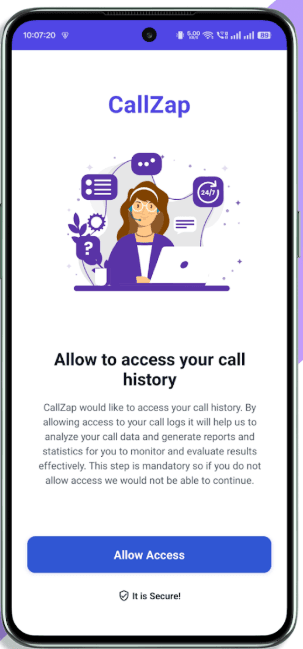
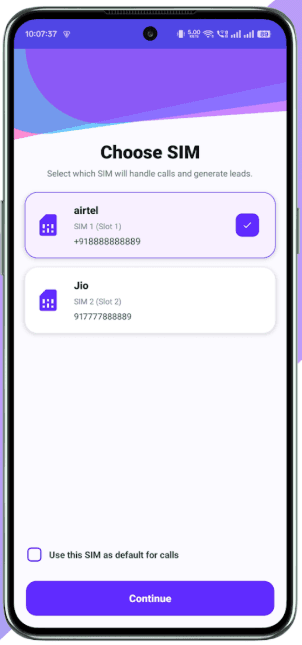
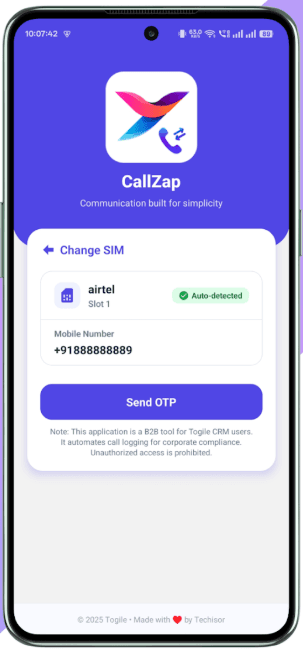
1. Install & Onboard
- Download: Play Store
- Permissions: Call logs, Phone, Contacts, Storage
- SIM: Auto-detect or select (dual-SIM support)
- OTP: Verify via SMS to selected SIM
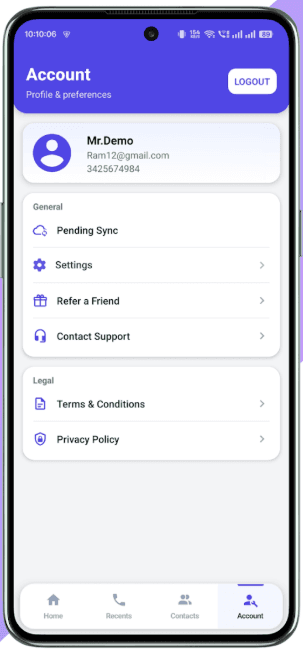
2. Acconts & Setting
- Home: See all your call analytics with pending sync.
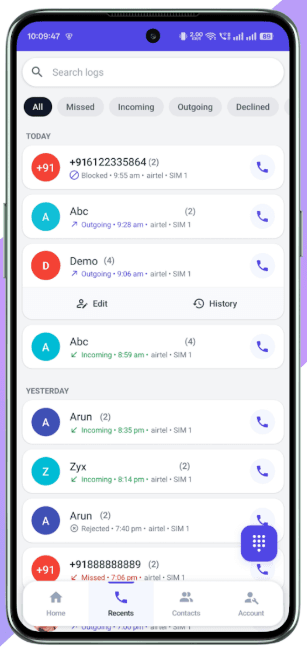
- Recent: Manage recent calls/history with filter or built-in dialpad for new calls.
- Contacts: Manage your contacts(add, edit, share, delete, call or message).
- Account: Manage your accounts (Logouts & Pending Syncs).
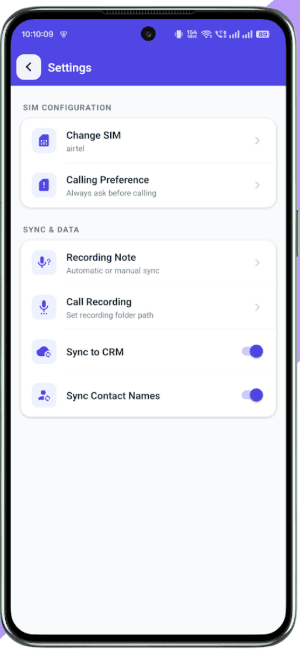
- Settings: Change default sim, calling preferences and manage syncing of leads.
Part 3: Togile CRM Lead Flow
Call Logging & Lead Generation
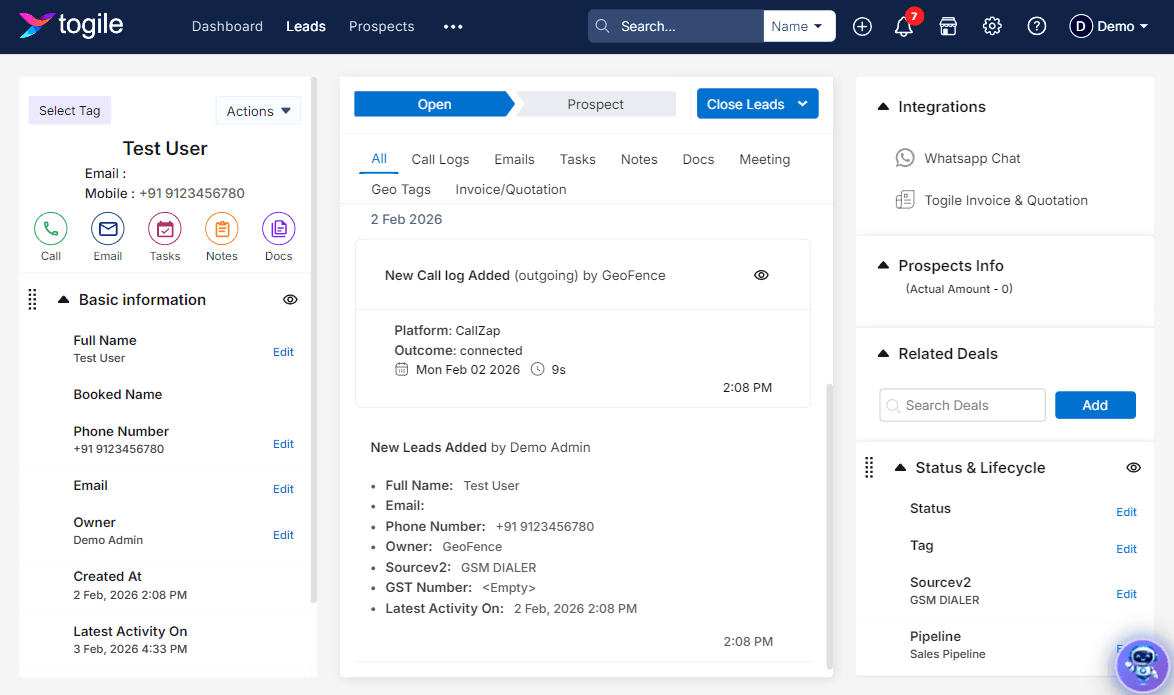
Every call auto-creates Togile Lead: Source=GSM_DIALER, Platform=CallZap.
Additions details like Outcome: Connected/Rejected, Call Durations, Name: Contact Name/ Unknown or existing lead name and view more eye button to see call recordings if available along with internals details of lead .
Call Recording Sync Guide
Automatic vs Manual sync explained for devices and Android versions.
1. Synchronization Modes
CallZap adapts to Android restrictions with two sync methods.
Automatic Sync ✅
- Available only on devices using Native OEM Dialer.
- Recordings stored in locally accessible folder like (/Recordings/Call/).
- Android 10+: "CallZap algorithm auto-fetches recordings. Setup recording path if needed: Account → Settings → Call Recording → Select Folder."
Note: If your Android OS blocks recordings, CallZap syncs leads and call data normally.
Manual Sync ⚠️
- Required for Google Phone App, Microsoft/Skype, third-party dialers
- These dialers sandbox recordings (Android OS security), preventing file access.
- Manual sharing required for recordings, or Automatic Sync works only when OEM/native dialer (ODialer) is installed and set as default.
- Download ODialer (if supported), then setup recording path in CallZap if needed: Account → Settings → Call Recording → Select Folder.
2. Manual Attachment Requirements & Steps
Connected Calls Only
Duration > 0 seconds. Missed/rejected calls excluded.
Unique Mapping
One recording per call log. Auto-hides after attachment.
Duration Validation
Warns if recording duration significantly exceeds call duration.
- 1Dial call from Google Dialer and record it
- 2In call details, click recording share icon
- 3Select "CallZap Attach Recording"
- 4Click "Attach Now" in CallZap
- 5Search/select recent call → Confirm attachmentSuccess!
Disclaimer: Call recording access governed by Android OS and dialer policies. CallZap adapts to all restrictions but cannot override OS limitations.